Opacity
CSS
The opacity property specifies the opacity/transparency of an element. The opacity property can take a value from 0.0 - 1.0. The lower value, the more transparent - see https://www.w3schools.com/css/css_image_transparency.asp
Animate
"If one first converts the bitmap to a symbol and then animates the instances of the symbol, the tween can effect other changes, in particular, changes in alpha transparency (e.g. fade in or fade out). This is done by selecting the instance of the symbol (make sure than Object is selected in the Properties Panel, as opposed to Frame) and then using the Color dropdown menu in the Properties Panel and choosing Alpha. (Note: If the color dropdown menu does not appear, use the select tool to click away on a blank area of the Stage and then select the instance of the the symbol instead."
Photoshop
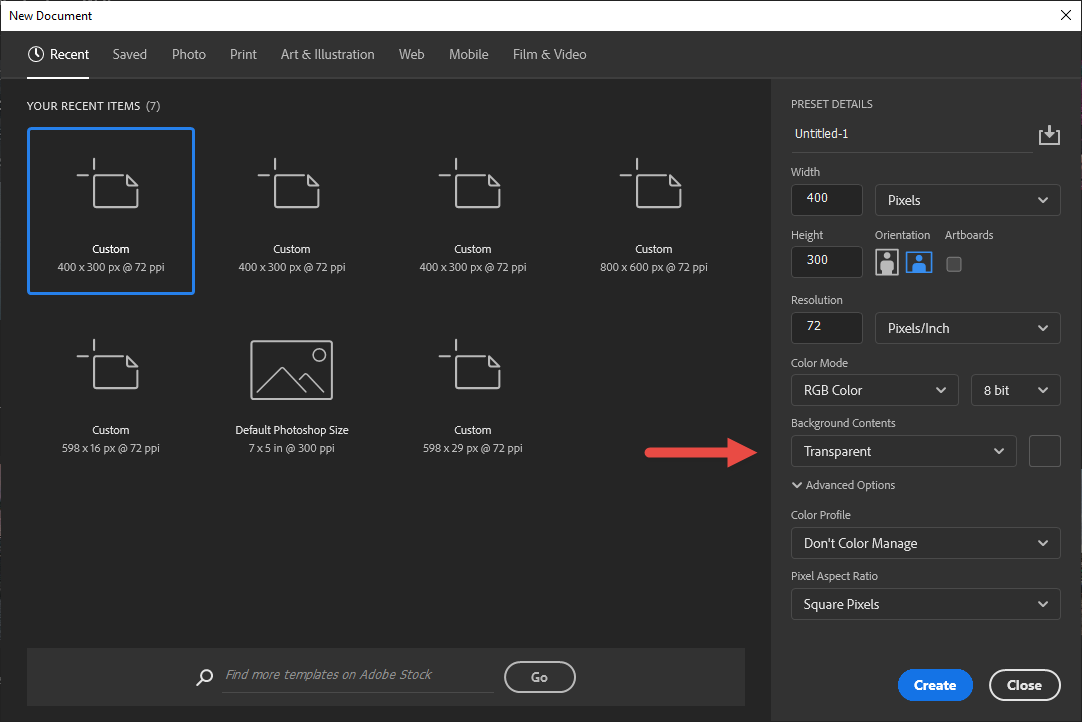
Whether the Background layer is transparent or not, is set when you create the Photoshop document.
You can change the opacity of any layer to reveal the layers underneath it. Select the layer for which you want to change the opacity. Click the arrow next to the Opacity field (a dropdown at the top right of the Layers panel just below the icons) to display the Opacity slider. Set the slider to the desired percentage value. A value of 0 is totally transparent; 1 is totally opaque.
Premiere Pro
You can do fade in or fade out directly in Premiere Pro. As described in the "Working with the Opacity Effect" section in the Premiere Pro 2018 text (pp. 372-374) and Chapter 14 of the Premiere Pro 2020 text, the steps are shown below:
- Increase the height of the video channel in question - you can do this by putting your cursor between the V1 and V2 (or whichever channel you want to change the height of) at the left side of the Timeline panel and dragging up.
- Change the slider at the bottom of the Timeline panel so that you can see the desired section of the Timeline.
- Click the Timeline Settings menu at the left side of the Timeline menu (it's the fifth icon in a horizontal row of 5 and looks looks like a wrench) and make sure that the option Show Video Keyframes is enabled.
- There is a horizontal line near the top of the clip in the Timeline that is called the "clip rubber band" which you can use to adjust the settings of effects applied to the clip. The default option is opacity. Click on the Selection Tool in the Timeline panel - it is the top tool in the set of 8 tools at the left.
- Hover over the clip rubber band and you should see a tooltip that indicates the opacity value at that point in the clip - the default value is 100 - in this case the horizontal line is near the top of the clip.. You can then drag the timeline down to reduce the opacity of the clip.
- The above procedure produces a uniform level of opacity across the clip. You can use keyframe opacity so that the opacity level changes across the clip. Ctrl-Click the rubber band - each time you click it will add a keyframe at that point - try doing 4 for the clip.
- You can then drag the keyframes up or down to adjust the opacity level at that point.
Volume
You can use the same procedure as above to insert keyframes into the audio portion of the clip and move them up or down to adjust the volume within a clip.
Revised: 4/17/2022